Christmas with BigClown - temperature/humidity/light intensity/pressure, uploading of code through UART, TAGs
- January 12 2018
- BigClown
- 2709 Reads
- 0 Comments
Another parts of tutorial about BigClown:
Christmas with BigClown - The first settings and review of modules
Christmas with BigClown - temperature/humidity/light intensity, uploading of code through UART, TAGs
I described a few BigClown modules (Core module, LCD module and Climate module) in the first part of tutorial.
Another module which is interesting and you use it is TAG module. It's very simple board with a few pin headers where you can connect TAGs and other modules like Core module or LCD module.
The TAG is very small board with sensor and each TAGs have the same pinout.
The TAG board, as I mentioned, includes 5pin headers on both sides.
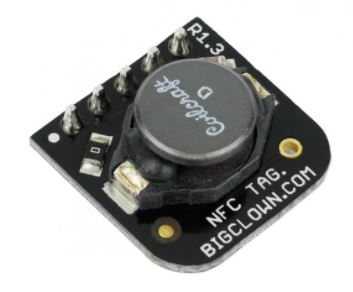
NFC tag:
The NFC IC is NT3H2111 by NXP comapany which contains 1kB EEPROM memory and the current during the run mode is only 240 uA.
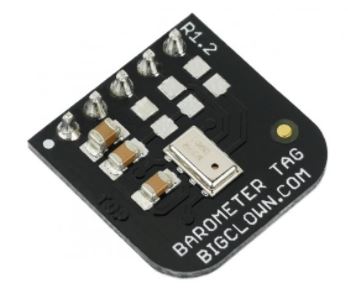
TAG for measurement of pressure:
This TAG contains MPL3115A2 IC by NXP company, the measurement range is from 20 kPa up to 110 kPa ( -698 to 11,775 m) and the accuracy is ?0.4 kPa.
The power consumption of IC is 2 uA during sleep mode,40 uA during run mode (1Hz sample rate).
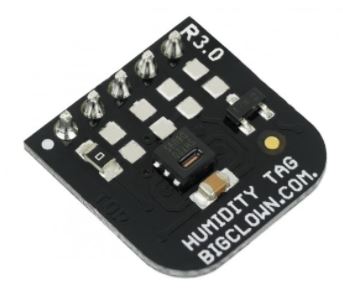
TAG with temperature and humidity sensor:
The SHT20 sensor by Sensirion company measures humidity (0 % to 100 %, ?2 % accuracy) and temperature (-40 ?C to +125 ?C, ?0.3 ?C accuracy). The power consumption is only 10 uA during the sleep mode.
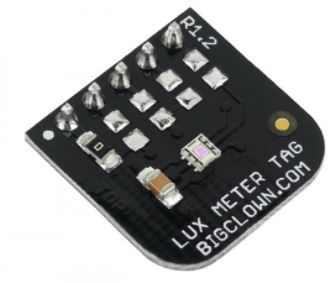
Light intensity sensor:
The OPT3001 by Texas Instruments measures the light intensity in range 0.01 to 83,000 lux. The sleep current is 0.3 uA, current during the measuring is 1.8 uA.
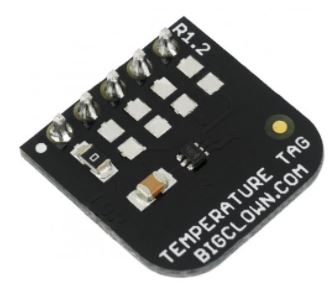
Temperature TAG:
TMP112 by TI is already used on Core module. The temperature range is -40 ?C to 125 ?C. The accuracy of temperature sensor is ?0.25 ?C in range 0 ?C to 65 ?C. Outside of this range is accuracy ?0.5 ?C.
The first way how to upolad the code is meantioned in the first tutorial.
You have to change boot mode of STM32, change to DFU mode.
In short: Connect the core module to USB, press the Reset (R) and Boot (B) buttons, release Reset button but still hold the Boot button. After that you can release the Boot button.
Then you can upload your code.
It's uncomfortable, I know. There is one more way. You can use UART bus.
Your USB-UART converter has to include DTR pin.
Connections
USB-UART converter | BigClown Core module
TX -> RX
RX -> TX
DTR -> Reset
GND -> GND
and BOOT pin of Core module has to be connected to 3.3V.
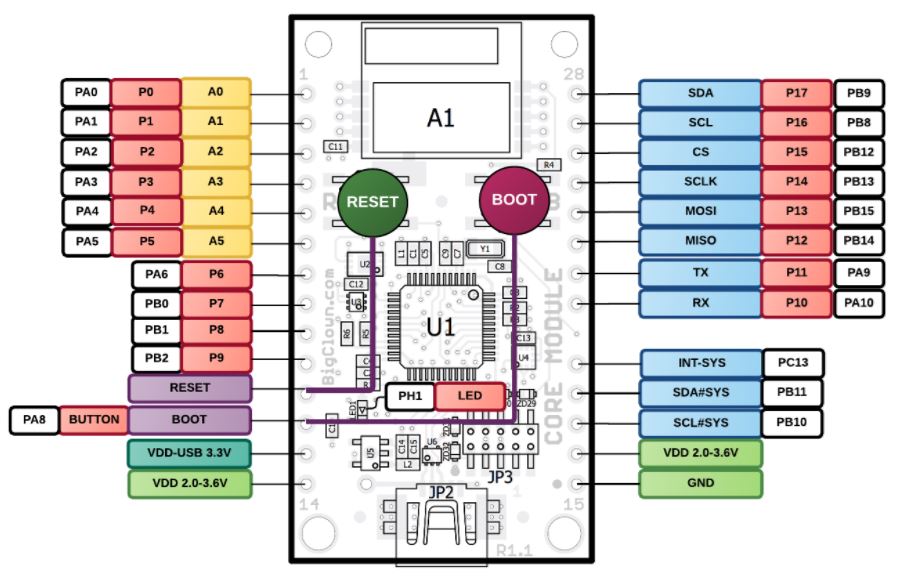
Ok, now, you can connect the USB-UART converter and Core module. Run BigClown Toolchain and after the compilation (command make) you can upload the code.
Ok, at first we have to find out the com port.
bcf devices
The answer could be: COM7
The uploading of code you use this command:
bcf flash --device COM7
The picture below shows steps.

The uploading of code is slower than when you use DFU, but it's not necessary press and release buttons.

If you want to connect more TAGs, is very good to use TAG module. If you want to use only one TAG, you can connect the TAG directly to Core module.
Ok, we connected the TAG, core module and LCD module, now we can write the code.
Both needed files (application.c and application.h) place to project folder and /app subfolder. Application.c is here, application.h.

The code is described directly in file. Also, you save both to project/app folder.
The Application.c file, the application.h file.

Ok, we merge both files and we make code which controls LCD and both TAGs.
The application.c file, the application.h file.
Save both files to project/app folder.

The latest example is measurement of temperature, humidity, light intensity and atmospheric pressure. The data is showed on LCD display.
There is comparison with data from near wheather station and my mini wheater station with ESP12E and Si7021 (temperature/humidity).
Save both files to project/app folder.
Application.c file, application.h file.


